


How to Add Coolant to the Radiator
WARNING
An electric engine cooling fan under the hood can start up even when the engine is not running and can cause injury. Keep hands, clothing, and tools away from any underhood electric fan.
WARNING
Steam and scalding liquids from a hot cooling system can blow out and burn you badly. They are under pressure, and if you turn the surge tank pressure cap—even a little—they can come out at high speed. Never turn the cap when the cooling system, including the surge tank pressure cap, is hot. Wait for the cooling system and surge tank pressure cap to cool if you ever have to turn the pressure cap.
If coolant is needed, add the proper mixture directly to the radiator, but be sure the cooling system is cool before this is done.
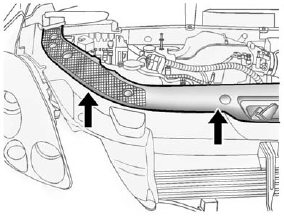
1. Detach the fasteners and lift off the panel that covers the radiator cap.

2. Remove the radiator pressure cap when the cooling system, including the upper radiator hose, is no longer hot.
Turn the pressure cap slowly counterclockwise about one full turn.
If a hiss is heard, wait for that to stop. A hiss means there is still some pressure left in the system.
3. Keep turning the pressure cap slowly and remove it.
4. Fill the radiator to the base of the filler neck with the proper DEX-COOL coolant mixture.
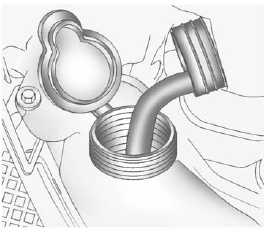
5. Fill the coolant recovery tank to the FULL COLD mark.
6. Reinstall the cap on the coolant recovery tank but leave the radiator pressure cap off.
7. Start the engine and let it run until the upper radiator hose feels warm. Any time during this procedure, watch out for the engine cooling fans.
8. If the coolant level inside the radiator filler neck is low, add more of the proper DEX-COOL coolant mixture through the filler neck until the level is back up to the base of the filler neck.
9. Replace the pressure cap.
Be sure to secure it tightly.
At any time during this procedure if coolant begins to flow out of the filler neck, reinstall the pressure cap.
Notice: If the pressure cap is not tightly installed, coolant loss and possible engine damage may occur. Be sure the cap is properly and tightly secured.
See also:
Muting a Call
During a call, all sounds from inside the vehicle can be muted so that the person on the other end of the call cannot hear them.
• To mute a call, press , and then say “Mute call.” . To cancel ...
What Makes a Denali
The changes from a regular Acadia to a Denali are obvious from the outside,
and they make the Acadia Denali look more put together, as if it were sculpted
from one piece of metal rather than glued ...
If the Vehicle Is Stuck
Slowly and cautiously spin the wheels to free the vehicle when stuck in sand, mud, ice, or snow.
See “Rocking Your Vehicle to Get It Out” later in this section.
If the vehicle has a traction sys ...